Today it is difficult to imagine a modern apartment, or even more so an office, that is not equipped with the appropriate set of office equipment: computers, laptops, tablets, mobile phones. And where all these devices are available, there should naturally be the Internet. He has firmly entered our lives, occupying one of the most prominent places there. On the Internet we study, work, have fun, relax, and communicate. Therefore, providing comfortable access to the World Wide Web for yourself and your loved ones is a problem that sooner or later every person has to solve. Fortunately, now we have a reliable assistant that allows us to carry out the most effective and simple solution to this issue without any additional intellectual and financial costs. We are, of course, talking about Wi-Fi technology.
But in order to use the “over-the-air” Internet, you need to know where to find and how to turn on Wi-Fi on your computer. We tried to present the answers to these questions in this article.
What is WiFi?
Wireless Internet technology has become part of our everyday life. We habitually identify Wi-Fi with a convenient, reliable and fast Internet connection, which we encounter at home, at work, in public places - in airports, cafes, shopping centers.
Answer the question “what is Wi-Fi?” the simplest way is this: this is a network protocol, with the participation of which communication is carried out between an “access point” and a “client”, or an “access point” and several “clients”, packet data is exchanged on a local network or via the World Wide Web.

Currently, the abbreviation Wi-Fi means nothing and is not officially deciphered in any way, but when creating this protocol, the developers “gave it a name” by analogy with Hi-Fi (High Fidelity). It stood for “Wireless Fidelity” - wireless precision.
Benefits of use
Of course, the “over-the-air” Internet is not an ideal technology. You can give several examples of the difficulties that may arise when using it. One of the most widely known is the so-called “noisy” connection. Many household appliances (for example, microwave ovens) emit in the range used by this protocol, and alternative connection devices (for example, Bluetooth) operate. Interference can also be caused by walls and ceilings. All this negatively affects the speed and quality of access.

At the same time, there are no less positive aspects from using it at home and in the office. We list just a few and the most obvious of them:
- Low cost of wireless networks and installation of several access points that will provide stable coverage throughout the entire territory. At the same time, there are no cables, extension cords or adapters that constantly get tangled and clutter up the space. An “aerial” connection is indispensable in rooms of historical value, as well as in rooms with obstructive architectural features;
- This protocol provides full access to the Internet to any device - be it a mobile phone, tablet, laptop or desktop computer - without being tied to a specific location. Access to the global information space through this protocol is an opportunity to comfortably use the Internet while lying on your favorite sofa;
- Wi-Fi allows you to synchronously use a large number of active connections. Having established a wireless connection, you don’t have to worry about how many computers and mobile devices will be accessing the Internet at the same time.
What types of Wi-Fi modules are there for a computer?
All popular devices now come with adapters by default. They can be connected to the Internet out of the box, but what about those who have a desktop computer? The answer to this question is obvious - you need to purchase an additional Wi-Fi receiver, install, connect and configure it.
We will talk more about how to install Wi-Fi on a computer below. Now we propose to decide what types of receivers there are, what is their difference, specificity and advantages.

“Air” adapters come in two types: external and internal. External ones are the most commonly used and easier to operate. The external receiver looks like a miniature USB drive (flash drive). It connects to a USB connector on the front or back of the computer, either directly or via a USB cable.

The internal adapter is slightly larger and you will need to open the computer case to install it. Therefore, buy an internal receiver only if you are confident that you can figure out how to install it on the motherboard yourself. When installing an internal module, you must first disconnect the antenna from it, insert the board into the corresponding port on the motherboard (the PCI interface is most often used for this) and return the antenna to its place.
Further manipulations for installing and turning on wireless adapters are the same and do not depend on the modification and method of connection to the computer.
How to install drivers?
Any Wi-Fi receiver is supplied with a disk from the manufacturer, which contains the drivers necessary for full operation of the device. In addition to drivers for a specific device, the disk may also contain drivers for other adapter models, so during installation you need to be careful and not miss choosing the device for which you are installing drivers.

Otherwise, the driver installation procedure is standardized and provided with an intuitive interface with detailed tips from the “Found New Hardware Wizard.” Just carefully read the messages that will appear on the screen and click the appropriate “Next”, “OK” and “Done” buttons.
Most adapters are automatically recognized by current computers and can work even without installing drivers from the bundled disk. Just connect the device to the desired connector and wait a few seconds. As a rule, after this a message will appear in the tray stating that new equipment has been found, identified and installed, which is ready for use. However, universal drivers cannot completely replace specialized software. Therefore, we advise you not to neglect installing drivers, even if everything seems to work flawlessly at first glance.
The driver disk for your Wi-Fi receiver model may also contain a special utility from the developers, which is designed to facilitate the process of setting up Internet access. Moreover, this utility will allow you to further control your Internet connection, monitor the speed and volume of data transfer.
How to set up Wi-Fi in WIN XP?
In this guide, we will assume that your home “Access Point” and Internet distribution device are already configured.
So, to establish an “air” connection on a computer running Win XP, you need to do the following:
- Open the Start menu;
- Select “Network Neighborhood”;
- In the “Network Connections” window, find the “Wireless Network Connection” icon;
- Right-click on the icon and click “Properties” in the list;
- In the “General” tab, find the “Internet Protocol TCP/IP” item;
- Click the “Properties” button.
If the use of specific IP and DNS addresses is critical for your provider, then in the window that opens, select the “Use the following IP address” radio button. If these parameters are configured in automatic mode, then do not touch anything.

When manually setting up IP, you will need to fill in the following fields:
- IP address: 192.168.0.2 (You should check this parameter with your provider, the value may be different);
- Subnet mask: 255.255.255.0;
- In the “Default Gateway” line you should enter the address of your router or modem, usually 192.168.0.1 or 192.168.1.1. But to avoid mistakes, it is better to check the documentation of your device;
- Click on the “Use the following DNS server addresses” switch and fill in both fields: primary and secondary DNS server. Information about the DNS servers used by the provider can be found on the official website of the telecommunications company or by calling technical support;
- Without closing this window, select the “Wireless Networks” tab at the top and check the “Use windows to configure the network” checkbox. Next, click the “Wireless Networks” button. Here you will see a list of all available connections. Select the connection that is configured on your dispenser and click the “Connect” button. Now, in order to connect to the Internet, all you have to do is enter the username and password you know.
How to set up Wi-Fi in WIN7?
There are two ways to set up an air connection in Win7 OS: automatically and manually. The second option may be useful if the network you plan to connect to is hidden from the general list for security reasons, but you know the name and password to connect your computer to it. Let's look at both methods step by step.
Installing Wi-Fi in Win7 OS automatically
When the operating system is loaded, you can see the “Wireless Network Connection” icon in the lower right corner of the screen. Click on it. This will open a list of air connections available to you. you need to select from the list the one that is configured in your modem or router.

Installing Wi-Fi in Win7 OS manually
To configure the connection manually, select “Network” in the system tray, then “Network and Sharing Center”. Click “Set up a new connection or network.” In the next step, check the “Connect a wireless connection manually” option and click the “Next” button.
In the next dialog, fill in all the appropriate fields: specify the network name, encryption type and security level. In most cases, the default settings can be left unchanged - use AES and WPA2. In the “Security Key” field, you must enter the connection password. For greater security, check the “Hide characters” checkbox so that the password cannot be read over your shoulder.

The final touch - if you plan to use this connection as the main one in the future, then check the “Start this connection automatically” checkbox. Then click the "OK" button.
Installing a device in Windows 8
To connect a wireless connection in Win8, do the following:
- Click on the Wi-Fi icon in the system tree on the taskbar or call Settings Charm through the Charms Bar (similar to pressing the win+I combination). The Wi-Fi panel will appear on the right side of the screen;
- you will see the entire list of wireless networks available for connection. Select the one that is configured for you and click the “Connect” button;
- The next step is to check the network connection conditions. The system will check the requirements of the selected network and prompt you to enter the necessary data;
- After checking the network requirements, the system will prompt you to enter a password. Enter the security key you know and click the “Next” button;
- If the password is entered correctly, you will see the message “Connection complete”, which means the connection to the Internet has been established.
How do I turn off my device?
To turn off Wi-Fi or edit previously entered data, you should select the wireless networks icon in the tray (relevant for Win7 and Win8) and in the drop-down list of all available connections, select the one that you configured earlier. To disable, use the “Disable” button, and to edit, right-click and select “Properties”. In the “Connection” and “Security” tabs, you can either disable the device or make changes to the password, encryption type, or security level.

For Win XP you need to do the following:
- Start Menu;
- Network Neighborhood icon;
- "Wireless connection";
- In the list that opens, select the established connection and click the “Disconnect” button.
Thanks to their mobility and stylish design, as well as good functionality, laptops and netbooks have become very popular. Nowadays, every modern person uses the Internet. Thanks to Wi-Fi technology, taking a book with you to a bar or cafe you can communicate with friends and work colleagues, check your email, read news on the Internet and much more.
Many laptop users are interested in the question: how to turn on WiFi on a laptop. As a rule, in order to turn on Wi-Fi you need to perform a couple of simple operations.
Quickly turn on wifi on a laptop
The combination of keys pressed depends on the specific laptop model. Here are several options for launching a wifi network on popular models.
- On Samsung laptops, to turn on wifi, you need to press the Fn and F12 or F9 buttons for a couple of seconds, depending on the model.
- On Aser laptops, turn on by holding the Fn + F3 buttons
- To enable on Asus, you need to press Fn + F2
- On Lenovo, turn on wi-fi by pressing Fn + F5. But there are also models where there is a separate switch with a wireless network design for this.
Different laptop models from different manufacturers use their own keyboard shortcut to turn on Wi-Fi. For more detailed information about the startup scheme, please refer to the user manual for the laptop. All modern laptops have an Fn key. If there is no such button, then there is a separate switch or button to start wifi. And it looks like this:

Did you turn on Wi-Fi using the required key combination or a separate button, but it doesn’t work? This means you need to configure wifi on your laptop.
Checking Wi-Fi Drivers
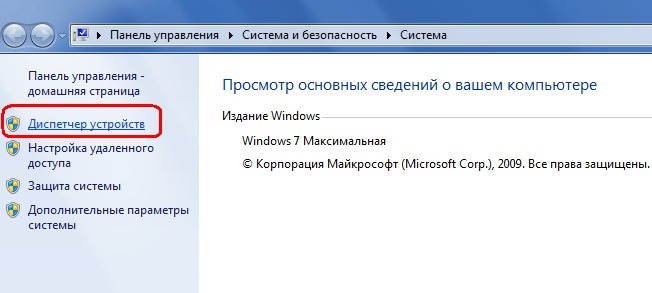
Let's start with the basics, check the version and the presence of installed drivers. This is necessary to make sure whether the necessary drivers are available and whether they are enabled. On the desktop, select the icon<<компьютер>> and select the item<<свойства>>. Then in the left column select<<диспетчер устройств>>.
In the window that opens, find the line network adapters. This line should contain our wifi adapter and be signed as a wireless network adapter.

If there is no such line or there is an icon with an exclamation mark on a yellow background, then the driver is either not installed or is not working correctly. We solve the problem by installing them from the disk that came with the laptop. If there is no such disk, then you will have to look for them on the laptop manufacturer’s website.
Turn on the Wi-Fi adapter
We sorted out the drivers by installing the ones necessary for our laptop model. Now you need to start wifi. To do this we do the following: Control Panel > Network and Internet > Network and Sharing Center > Change adapter settings. Choose Wireless network connection Right-click on it and select Enable from the menu.

If everything was done correctly and wi-fi was turned on, then you will see this icon on your desktop.

Click on the icon, a menu will appear with available wireless networks, which should include yours.

After you click on the name of your network and click Connect, a window like this will appear in which you need to enter the security key - the password for your network. If it is not password protected, the connection will occur automatically.

If the user cannot find and turn on the Wi-Fi adapter, he will not be able to connect to the Internet. On laptops, including HP ones, the adapter is the only way to connect to the Internet.
Enabling the WiFi adapter on HP laptops
The WiFi adapter is different for each individual brand of computer. Most often, in order to turn on the WiFi adapter, you need to press a certain key combination (FN+...). Less often, the adapter is turned on by pressing just one button. In addition, the way to enable WiFi is completely different on each model.
For example, in the case of an HP laptop, the solution to the problem is just a few keystrokes on the keyboard. In other cases, things may be slightly different. Most often, on HP series laptops, WiFi can be turned on only by sliding your finger over the touch button with the image of a small communication antenna. In some cases, you can connect to the Internet by pressing a certain key combination - FN and F12. On other models of HP laptops, turning on the WiFi adapter is carried out by simply pressing the button with the image of an antenna.
Connecting a WiFi adapter to laptops of other brands
As mentioned above, turning on the WiFi adapter can be done in different ways, depending on the model and brand of the laptop. In order to find out how this is done on laptops of other brands, you must carefully read the computer's operating instructions (a user manual is included with each computer).
As for connecting using key combinations (FN+...), in most cases this is the method used. In addition, this function button can perform other operations. If you do not see such a functional button on yours, then most likely your wireless connection to the Internet is carried out in some other way described above (you need to press some special switch or use another button designed specifically for this) .
Wireless networks allow you to connect to the Internet literally over the air. However, to do this, your device must have a Wi-Fi module. The article will describe how to check for the presence of this module for a laptop in order to enable it. In this case, we will look at ways to enable it through network settings in different versions of Windows OS, as well as the procedure for updating Wi-Fi drivers on your laptop.
Checking Wi-Fi availability on a laptop
All modern models, without exception, are equipped with Wi-Fi modules. You can verify this using the documentation. In the technical manual, in the specifications of your laptop, you should see the inscription IEEE 802.11 (the letters a/b/g/n may be present at the end). This indicates that your device supports wireless data transfer protocols and, accordingly, has a Wi-Fi module.
You can go online. Find your model in any store or on the manufacturer's website. In the “specifications” section, look for the line “Wi-Fi standard” or “Network adapters”. You can check the availability of hardware using the task manager, but this will be discussed later.
Enabling Wi-Fi on the case
To make life easier for users, some laptop manufacturers place a Wi-Fi power button on the device body. Inspect the main panel with the keyboard. The button can be placed above the Escape key, on one of the function buttons, or in the right corner. It shows an antenna icon with signals diverging from it. Many models have a light indicator that indicates the functionality of the Wi-Fi module.
If the required button is not located near the keyboard, inspect the side panels. They may have a toggle switch with On/Off positions or a regular button. Move the toggle switch to the On position to turn on the wireless network module.

LEDs can tell you whether Wi-Fi is working. They can be built into the housing on the front panel or directly into the button.

Now you know where to look for the buttons and how to turn on Wi-Fi on your laptop. Before moving on to other methods, carefully inspect your device from all sides.
Enabling by keyboard shortcut
You can also turn on Wi-Fi on a laptop using a key combination. As a rule, additional laptop functions (changing the backlight, turning off the screen, and so on) are placed on the F1-F12 keys. In order not to interfere with the main purpose of the buttons, additional functions can only be activated in combination with a special key. On products from Asus, HP, Samsung, Acer, Lenovo and others, the Fn key is included in the keyboard for these purposes.
The user should hold it down and then press the button with the Wi-Fi icon (this can be F2, F3 or F12. It all depends on the laptop model). Upon successful activation, the indicator light should light up (if provided by the design), and an icon for selecting a connection point should appear on the toolbar in the lower right corner.

Checking the adapter in Device Manager
If there are no hints about the presence of an adapter, we recommend looking at the task manager. The following instructions will help you do this:

Attention, if there is a yellow exclamation mark next to the adapter, this means that the device is not working correctly, accordingly, you need to reinstall the drivers (or install them). This will be discussed in subsequent paragraphs.
Enabling Wi-Fi in the OS network settings
If the driver is installed correctly, but you cannot connect to the wireless network, you need to activate the adapter in the network settings of the operating system. Next, we will describe how to enable Wi-Fi on a laptop in various versions of the Windows operating system.
Windows 7
To enable the Wi-Fi network adapter on a laptop running Windows 7, you must do the following:

Wait for connection. This will take a few seconds. After this, you will be able to connect to the wireless access point.
Windows 10
The “Ten” has a different interface from the “Seven”, so many users do not know how to enable Wi-Fi through the network settings. This instruction will help you solve all problems:

You can also get to the adapter settings menu through Windows settings. To do this, you need to select the “Network and Internet” section (Ethernet sub-item).

How to update your Wi-Fi driver
The most common reason why Wi-Fi does not work on a laptop is the absence or incorrect installation of drivers. This is specialized software that allows the module to function correctly in your operating system. There are several ways to update drivers:
- through the standard Windows interface;
- independently, i.e. manually;
- using specialized software.
Let's consider each of the methods separately.
Updating the driver using Windows
The standard interface of Windows 7-10 operating systems allows you to update the driver for any laptop component. This can be done through the “Task Manager”:
- Enter the “Task Manager” (this was described in detail earlier). Find the required network adapter.
- Right-click on it and then click “Properties”.
- Select the Driver tab and click Update.

The system may display a message that you have the latest driver installed, but this information is not always true. If updating the driver using this method did not work, perform a self-installation.
Manual installation
This is the most reliable way. It consists of downloading the necessary driver from the official website of the developer. You can find the driver in the “Support” or “Products” sections. In the list, you need to indicate the model of your wireless adapter. Be sure to find out the bitness of your operating system (32 or 64 bits). This will be needed when downloading some individual drivers. Typically, the file has ".exe" permission.
Many people already use a wireless network, because it is convenient, especially if you have such autonomous devices at home as and a smartphone. And if you are already among those who purchased and connected a router, all you have to do is find out how to turn on Wi-Fi on your laptop and start using wireless Internet.
Connecting Wi-Fi using the hardware method
Almost all laptops have a button or switch for Wi-Fi. They can be located either on the top of the case near the keyboard keys, or on the side of the laptop.
If you don't find a button or switch on your device, you can connect Wi-Fi using the keyboard. On one of the keys from F1 to F12 there is a drawing in the form of an antenna or laptop with “waves” emanating from it. You need to press the desired button in combination with the Fn key.
Where to turn on Wi-Fi on HP laptop: The network is turned on using the touch button with an image of an antenna, and on some models - by pressing the Fn and F12 key combination. But there are also HP models that have a regular button with an antenna design.
How to turn on Wi-Fi on an Asus laptop: on computers from this manufacturer you need to press a combination of the Fn and F2 buttons. On Acer and Packard bell, you need to hold down the Fn key and simultaneously press F3. To turn on Wi-Fi on Lenovo, press F5 together with Fn. There are also models that have a special switch for connecting to wireless networks.
On Samsung laptops To activate Wi-Fi, you need to hold the Fn button and simultaneously press either F9 or F12 (depending on the specific model).
If you use an adapter, then you don’t need to know how to turn on Wi-Fi on your laptop, since it is always turned on by hardware. But to be completely sure, you can check the operation of the adapter using the Fn key combination with the one that shows the wireless network, as we described above.
Connecting Wi-Fi using programs
If, after turning on a button, switch or keyboard shortcut for Wi-Fi on your laptop, you still do not have a network, the wireless adapter is probably turned off by software, that is, disabled in the OS settings. You can connect it in two ways:

If the device still does not start or an error is displayed, download the drivers for the adapter from the official website and install them, then try steps 1 or 2 again.
If your laptop comes with Windows installed from the factory, you will need to run the laptop manufacturer's wireless network management software. They are included with almost every computer, and they are called “wireless assistant” or “Wi-Fi manager”, and are located in the “Start” - “Programs” menu. Sometimes, without running this utility, no effort to connect to the network will work.